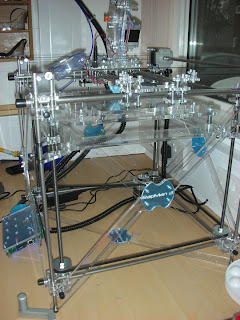
 Another rainy Tuesday in Scotland, the perfect opportunity work on a RapMan. Visiting Greenock Academy it is clear that the club is in full swing building their kit in order to produce some models for Friday. The team here are a great bunch of 4th years now progressing into 5th years and their highers, allowing them a great opportunity to use the kit throughout their later years.
The day started with the team each building different parts of the top corners, y axis, x axis and the carriage. Thankfully with two University of Strathclyde ambassadors (James and Gavin) it was possible to make some adjustments and provide some clarity on the instructions, speeding up the day of building.
Posters explaining CAD and Rapid Prototyping were provided by DMEM and much appreciated by the school, discussion later turned to the Friday competition and event, it was explained that there were two competitions and the brief was distributed. Talking over the possibility of bringing the machine to the event it was remembered that even the Bits From Bytes representatives said the machine did not travel well in January so perhaps just bringing some of the prints would be best.
It seems this school are using a mixture of AutoCAD and Inventor for different classes but the staff has a good understanding of both. The confusing process of exporting CAD models as STL, then conversion of STL to GCode with NetFabb was given and some experimentation of slicing with NetFabb was performed in expectation of printing some real models later in the week.
There were a few interesting observations made on the day including the manuals containing some unclear and contradicting parts but sense was eventually made of the stages. It was noted that there was originally confusion between the version 3.0 and 3.1 instructions online that are subtly but quite different. This club prefers to view the print version on screen to enable zooming of the pictures.
Even with the build over a short period of time there were already some screws, bolts and nuts missing, some substitution for technology department supplies was necessary. Quite a bit of time was spent attempting to get wires through conduit with the sample ABS filament until it was eventually suggested steel wire be used, this made the process a breeze.
The day finished by powering on and successfully testing the machine movement for the first time. The to do list for following days included soldering the extruder connector, tightening Z-axes, assembling the PCB and finishing fitting of the sprung loaded bed. The main steps of the operation manual were explained and we wish the best of luck to the group in their 3d printing future.
- Gavin and James from the University of Strathclyde


